How to Charge RC Batteries
Posted: 9/30/24
How to Charge RC Batteries: A Beginner’s Guide to Charging LiPo and Other RC Batteries
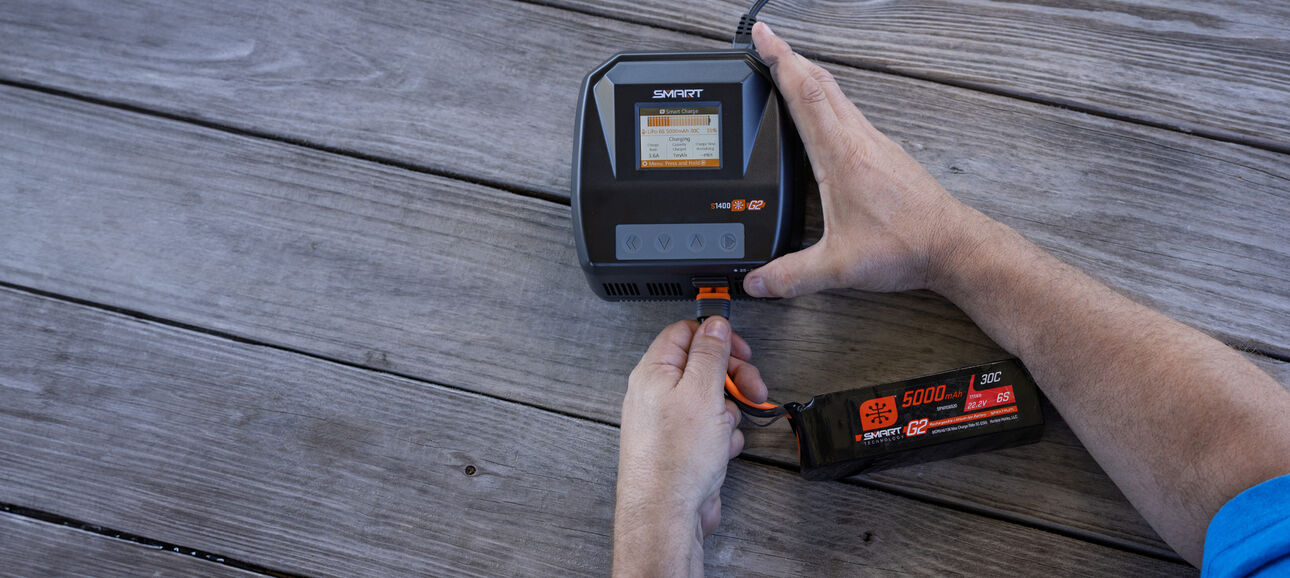
Charging RC batteries can be nerve wracking when you’re new to the radio control hobby. And with good reason! When done wrong, charging an RC battery can start a fire, which is why you never leave a charging battery unattended or try to charge at the wrong settings. In this beginners’ guide to charging LiPo and other RC batteries, we’ll walk you through how to charge RC batteries with the right settings to do it safely while also maximizing the life of your batteries.
Step 1: Battery Identification
The first step in identifying your RC battery before charging it is to make sure there are no signs of damage. If your battery pack has expanded, warped, cracked, or shows any other form of damage, do not charge it.
Battery Type
There are several types of batteries that are commonly used in the radio control hobby. By “type,” we’re referring to the chemistry of the battery, or its chemical make-up. Your Ready-to-Run RC car or Ready-to-Fly RC plane likely came with the correct battery needed, but if you aren’t sure, check your owner’s manual for more information about your battery’s chemistry, or type. These are the most common for RC batteries:
- Lithium Polymer (LiPo): LiPo batteries are the favorite for RC batteries because they are compact, lightweight, and provide full power until the very end. Other types of batteries will slow down as they power down, resulting in a loss of power to your RC car or plane as you use the battery. LiPo simply doesn’t do that. LiPo also offers significant power for its size and weight.
- Nickel-Metal Hydride (NiMH): Many beginners start with NiMH batteries because of their affordable cost. If you’re just starting in the RC hobby and you want to keep costs down until you know you love the hobby, NiMH batteries are the way to start.
- Lithium Ion (Li-ion): Like LiPo batteries, Li-ion batteries offer good power for their size and weight, making them a popular choice for high-power applications. The biggest difference between the two is the cells in Li-ion are in hard steel cans. As a beginner, you probably won’t be starting with Li-ion batteries, but they are worth mentioning as a popular choice in RC batteries.
Battery Size
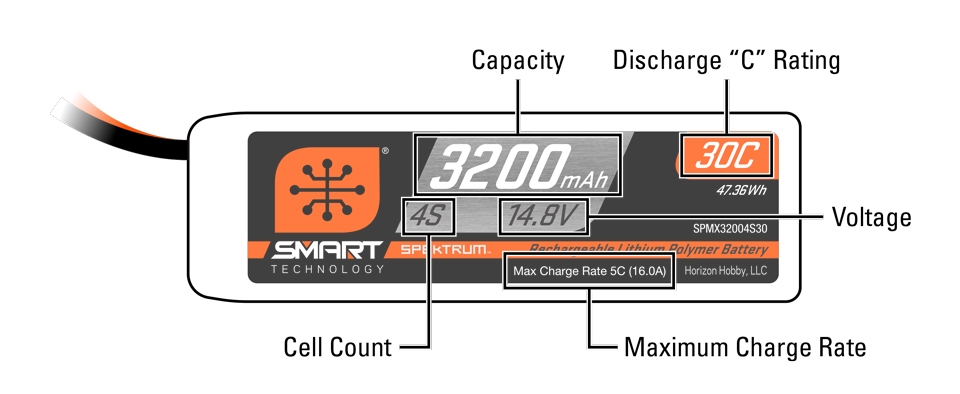
When referring to battery “size,” there are four elements that relate to charging. These include cell count, capacity, voltage, and discharge rate. Typically, the physical dimensions of a battery are the first thing referenced in terms of battery “size,” but the cell count “size” is usually what is being referenced in learning how to safely charge an RC battery.
- Battery Cell Count: This is the number of physical cells within a battery. You’ll see this referred to as the “S” count for LiPo RC batteries. For example, a 4S LiPo battery has four cells in it. The most popular LiPo batteries will have 2 to 4 cells. Most NiMH batteries will have 5 to 7 cells and will display their cell count on the battery pack.
- Battery Capacity: The battery capacity will be printed as mAh (milliamp-hours) on the battery casing. This is important to know when you’re ready to set up your charge rate.
- Battery Voltage: The battery voltage will also be printed on the battery casing, signified with the letter V. LiPo batteries usually have 3.7V per cell and NiMH batteries usually have 1.2V per cell.
- Battery Discharge Rate: This is the maximum amount of current that can be pulled out of the battery by the RC car, boat, or airplane. This is written as a “C” rating, with a higher rating generally allowing for more current to flow easily from the battery. For example, boats require a high C rating, as they draw a lot of current, while small crawlers and minis require a much lower C rating. Don’t let this “C” rating confuse you with your charge rate, which we will go over shortly.
RC Battery Technology
Is your battery a Spektrum Smart Technology battery? Having a Smart battery with a compatible Smart charger will make charging a whole lot easier! Spektrum Smart Technology provides you with safety, simplicity, and convenience in your RC battery charging. When a Smart battery is connected to a Smart charger, the two communicate instantly and automatically about what the battery needs, including information about the battery type, capacity, individual cell voltage, temperature, and more. The Smart battery can do this through a microchip and a special connector to communicate the information.
Step 2: Supplies Needed for Battery Charging
Now that you understand your battery type, size, and technology, you’re ready to gather your RC battery charger and supplies. You will need:
- RC Battery Charger: Make sure you are using an RC battery charger that is compatible with your battery type and size.
- Battery Charging Bag/Case: Stow your battery inside of a LiPo battery bag or other battery charging case while charging or discharging. These cases are designed to prevent fires should something go wrong while charging.
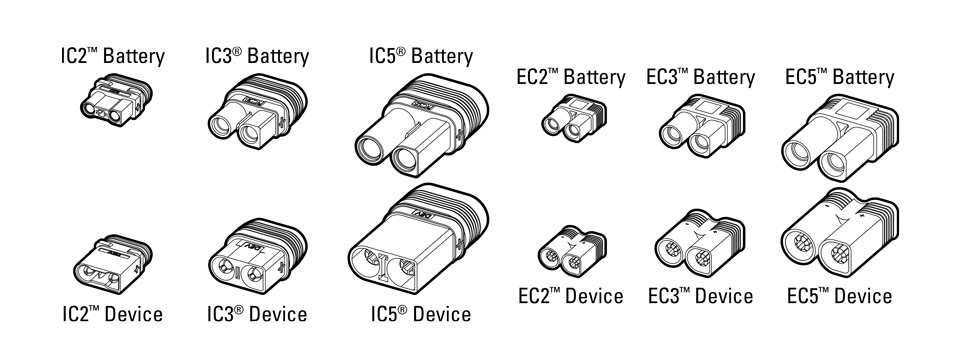
- Battery/Charger Adapters (optional): If the power lead connector (the larger cables with a plug coming out of your battery) and the connector on your RC battery charger are not the same shape, you’ll need an adapter. Check out our RC battery connector guide below.
- Battery Checker (optional): A battery checker is a handy little tool that can tell you how much charge is in your battery. They can be really useful when you’re at the track or airfield. If your RC battery charger doesn’t have a way to show how much charge is on your battery, this is a great resource.
Step 3: Plugging In
There are likely two different sets of cables with plugs coming out of your battery. The larger one with one red and one black cable will be your “power lead” and the smaller one will be your “balance lead.” Some batteries will not have a balance lead. The best practice is to plug in your power lead before you plug in your balance lead. Your power lead has polarity (once cable is positive) and should only connect one way.
Step 4: Enter the Battery Size into the Charger
If your charger and battery both use Smart Technology, they will understand each other in a few seconds, and you won’t need to select a size or a charge rate. If you are not using a Smart charger and battery, the RC battery charger will not know how big your battery is unless you tell it the size. This helps prevent overcharging.
Step 5: Select the Charge Rate
For a safe charge, charge at a rate of 1C (1C is one times the battery's capacity in amp-hours). For example, if you have a 1500mAh battery, the 1C charge rate would be 1.5A. The mAh will be on the side of the battery pack. Refer to the first part of this guide about battery identification if you need further help. Some batteries can handle a 1.5C or even 2C charge rate, but it is not recommended for safety reasons and to preserve the life of your battery.
Step 6: Stow the Battery in a Bag or Case
Your RC battery charger is now programmed and ready to charge your RC battery! It’s time to place your battery (while still plugged into the charger) in a safe charging container. This can be a LiPo bag or a specialty battery charging case that offers fire protection with room for the cables to pass through.
Step 7: Charge and Monitor
Begin charging your battery and stay with it for safety. If you notice anything unusual, like the battery pack expands, stop charging and keep the battery in a safe container for proper disposal. Your local waste and recycling center can provide you with information on safely disposing of a rechargeable battery. Do not simply throw it away.
When charging is complete, disconnect the battery from the charger and allow it to cool down before using it. Use your battery monitor to check how much charge is left in your battery before storing it safely when you are done driving, flying, or boating. The different types of batteries will need to be stored with different amounts of charge still in the battery.
Shop the Story
Related Articles
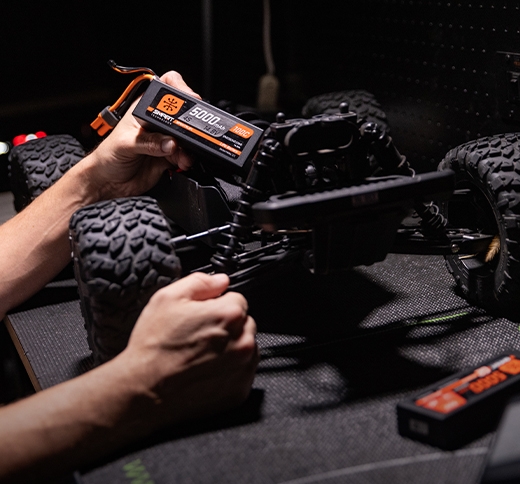
What RC Battery Connectors Should I Use?
Learn how RC battery connectors work and how to choose the best type for the batteries that power your radio control model devices.
Learn More
The Best RC Aircraft of 2025
Listing The Best Horizon Hobby Aircraft of 2025 from trainers, foamies, balsa, and helicopters.
Learn More

Setting Up a Real Flight Simulator to Practice Flying RC
An introduction to setting up a real flight simulator to practice flying RC airplanes and helicopters.
Learn More